
Press Escape to clear.
- How to move a Kinesense licence to a new PCDelete the licence on the old PC and send us the deletion code, then send the new PC’s licence request code to get a replacement key.
- How to install Kinesense on a PC without internetUse the Kinesense Download Manager to build an offline installer on a USB key, then install Kinesense and its plug-ins on an offline PC.
- How to plot GPS data from a CSV file on the mapImport a CSV of GPS coordinates into Maps and Kinesense plots the points and joins them into a route you can edit like any other layer.
- How to build a Word report from tagsPick, order and rename the columns in the tags Word export, including images, evidence info and blank columns, and apply your own Word template.
- How to detect licence plates in CCTV videoFind licence plates, including small and partial ones, with the YOLO plug-in, then review them on the timeline and in the Grid tab.
- How to work out the true frame rate of a videoUse the timestamp in the frame to calculate the real frame rate in the import preview, and save analysis profiles for similar videos.
- How to export to PowerPoint and rotate spotlightsExport image reports to PowerPoint, rotate spotlight annotations, start picture-in-picture clips at the right time, and open a clip in Clarification.
- How to check if an image has been alteredUse error level analysis, EXIF and hex viewers, JPEG Snoop and image compare in the Authentication tab to test whether an image is genuine.
- How to classify vehicles and people and filter by typeClassify cars, vans, trucks, buses, bikes, motorbikes and people, tune the inflate sprite percentage, and filter or sort results by confidence.
- How to run multiple analysis algorithms on one videoReprocess a video with another algorithm, switch between the results on the Review timeline, and colour and rename each one.
- How to create and edit filters in the Review tabCreate and edit filters without leaving Review using filter mode, and keep an eye on drive space and speed from the status bar.
- Overview: new look, multiple algorithms and authenticationA first look at the refreshed interface, filters in Review, multiple algorithms per video, new vehicle classes and the Authentication tab.
- How to find guides, videos and tips in the Help tabReach the getting started guide, how-to and training videos, the manual and tips from the Help tab, and open More info help inside the import wizard.
- How to replace clip audio and add an annotation key slideAdd audio from another video or an MP3 or WAV file to a clip, create a key slide listing your annotations, and pick any annotation colour.
- How to convert a video Kinesense does not recognisePreview an unrecognised file with different decoders, then convert it in the import wizard by rewrapping or transcoding to MPEG-4.
- How to add map points, measure routes and search by addressAdd icons, text and arrows to the map, measure around corners to plot a route, search by address, and import or export the camera list.
- How to sort, filter and export tagsSort and filter tags, choose the columns shown, export to CSV, Word or JSON, pop out a tag, back up your work, and export tag images.
- How to search, sort and group the video listSearch, order and group videos, choose the card size, and open details, algorithms, tag objects and filters from each video card.
- Overview: redesigned video list, tags, maps and helpA first look at the redesigned video list and tags, new audio replacement and key slide annotations, map layers, the Help tab and the file converter.
- How to read dates from file names and set per-user settingsAdd and test regular expressions that read the start time from file names, and give each named user their own settings files.
- How to pop out tabs and manage video groups and tag objectsPop any tab into its own window for a second monitor, move videos between groups, collapse all groups, and move or jump to tag object images.
- How to calculate the time offset and rotate video on importLet the wizard work out the clock offset from the real and on-screen times, rotate or change the aspect ratio of frames, and choose an FFmpeg version.
- How to name annotations and use the annotation timelineName annotations, see audio waveforms, change arrow opacity, use Review shortcuts on the annotation timeline, and trim clips from the right-click menu.
- How to save tag searches and show them on the mapSave a tag search with a name and description, run it again from a drop-down, and open it in the Maps tab.
- How to preview a video before importCheck a video in the import wizard before processing, step through frames, choose an analysis profile, and set the analysis region on the real frame.
- How to add a picture-in-picture annotationOverlay one report clip on another, snap it to a corner, resize it, change its opacity and set when it starts and ends.
- How to show tags on the map and export a map to a reportSee event tags beside their cameras, filter them, trace a subject across cameras, and add a snapshot of the map to your video or image report.
- How to add image and measurement layers to mapsOverlay floor plans and other images on the map, measure distances between points, and save, load and delete map layers.
- How to use the Maps tab to view cameras and footageChoose map sources, show and search cameras, jump from a camera to its footage, link existing video, and set the default map view.
- How to add map cameras and link them to videosPlace cameras on a map with their viewing cone during import, and link or relink video sources to cameras afterwards.
- How to move tag objects between databasesExport the objects you created in Tags to a CSV file and import them into another database.
- How to share images to improve object classificationSave the images Kinesense classifies during import and share them with us to improve the model, lawfully and without personal data.
- How to schedule and queue video importsStart an import at a set time, or queue imports to begin automatically when the current ones finish, from the Advanced import options.
- How to view face recognition results in the Grid tabUse Where is…? to see everywhere a known person appears, and Who is…? to check every detected face against its possible matches.
- How to review analytics results in the Grid tabBrowse faces, attributes, objects and doorway results as a grid, sort and filter them, and send results to tags, reports or the Review timeline.
- How to detect faces and search by facial attributesFind every face in a video and identify attributes such as age, gender and glasses, then review the results on the timeline and in the Grid tab.
- How to classify people and vehicles on importAdd deep learning object classification to event detection, then build filters that only show the object types you are looking for.
- How to run several exports at once and set export lengthExports now run in the background so you can keep working and run several at once, and the maximum video export length is configurable.
- How to measure time and money saved with Kinesense AdvantageSee hours imported and watched, reports exported and time saved per user, with a cost estimate, and combine logs from every machine in your force.
- How to mark faces, batch-enrol people and identify a faceMark faces the server missed, enrol many people at once from a JSON file, and identify a face from an external, clarified or tagged image.
- How to review face recognition matchesCheck possible matches for each face in Review, add matches from the video or database, enrol new people, remove wrong matches and tag events.
- How to import video with face recognitionDetect faces during import and match them against a third-party face recognition server, and tune scale, minimum size and frame rate.
- How to analyse doorway CCTV without passing-traffic eventsUse the Doorway algorithm with an exclusion area to ignore traffic blocking the view, or a doorway filter to find movement starting or ending at a door.
- How to stabilise shaky video and clean up noisy framesSteady body-worn and phone footage with Stabilize, and combine frames with Temporal Median to recover plates and logos from dark, noisy video.
- How to import video from a Milestone VMSLog in to a Milestone server or open XPE and XPCO exports with the Milestone plug-in, then choose cameras and times to import.
- How to deblur and upscale an imageReverse motion, focus or Gaussian blur by modelling the blur kernel, and raise the resolution of an image with superresolution.
- How to use histogram edit and histogram equalisationBring out detail with manual histogram editing, global equalisation, and local equalisation for scenes with both bright and dark areas.
- How to invert, gamma-correct and split colour channelsShow an image in negative, reveal under- or over-exposed detail with gamma correction, and isolate the red, green or blue channel.
- How to reduce noise and sharpen an imageClean up low-light noise with median, conservative or adaptive smoothing, and recover detail with basic or Gaussian sharpening.
- How to adjust brightness, contrast and contrast stretchBrighten dark footage, raise contrast, and spread the tonal range with Contrast Stretch in the Simple section of the Clarification tab.
- How to rotate, mirror and scale an image or videoRotate footage by any angle, mirror or flip it, and scale it with nearest neighbour, bilinear or bicubic interpolation in the Clarification tab.
- How to crop and perspective-crop an image or videoExport just part of a frame with Crop, or straighten an angled area such as a licence plate with Perspective Crop, in the Clarification tab.
- How to import Vemotion recorder videoImport several channels of Vemotion video at once. Kinesense groups the hourly folders by channel and time, and you can mask the millisecond timestamp.
- How to import Afterburner DVDs from ISO imagesImport a stack of Afterburner DVDs on a PC with one drive by turning each disc into an ISO image and mounting it in Windows.
- How to import video that needs a third-party codecInstall a DVR manufacturer or H.265 codec, import with Video for Windows so Kinesense reads the file directly, then check which codecs are installed.
- How to change the template images in reportsReplace the header, footer and background images used in PDF image reports, video title slides and DVD menus, and preview the PDF before saving.
- How to enable, time and extend report title slidesTurn title slides on or off per clip or for every clip, change how long they show, and let long text flow onto extra slides automatically.
- How to search and filter tagsFind tags quickly by time, relevance, type, object, action and video, or search every field with free text, then export just the results.
- How to reprocess a video with different analysis settingsRe-run analysis on an imported video, or just part of it, with a different algorithm or mode instead of importing it again.
- How to import Ovation Afterburner DVDs and hard drivesImport Afterburner footage from DVDs or a removable hard drive, pick the recording mode, and use brute force mode when an index file is broken.
- How to send Kinesense logs to technical supportEmail logs to the support team from the Options menu, or save them to disk and send them from another machine when the PC is offline.
- How to override import mode, frame rate and recording codecForce Video for Windows, FFmpeg or DirectShow decoding, correct a misdetected frame rate, and store video as H.264 to save disk space.
- How to export, import and restore the CCTV player libraryExport and import player library entries, map virtualised players, download the latest library, and restore a backup, all from the Options menu.
- How to set up named users and loginsRequire a username and password for Kinesense so every action is logged for disclosure, using a named users list file or the user dashboard.
- How to match CCTV players by file signatureDrop a video on the PlayerManager Start tab to find a matching player by file name or file signature, and add new hex signatures to the player library.
- How to export case and report disclosure reportsExport a PDF of who did what in a case, and disclosure reports for video, image, annotation and clarification reports, to support evidential integrity.
- Kinesense keyboard shortcuts for playback and the timelinePlay, step, change speed and direction, jump between events and zoom the timeline from the keyboard, and remap any shortcut or jog shuttle button.
- How to customise the login screen in the Settings EditorAdd text boxes and drop-down lists to the Kinesense login screen and make them mandatory, so every session records the details you need.
- How to blur faces in video for GDPR subject access requestsRedact third parties before releasing footage to a data subject: track people with a spotlight, then blur, darken or pixelate inside or outside it.
- How to trim or extend a clip in the Report tabShorten or extend a report clip without going back to Review, using Edit Clip, Start Here, End Here and frame-by-frame controls.
- How to customise the Word tags report in the Settings EditorChoose the columns, date formats, header image, margins and footer of the tags report exported to Word, used by police as a viewing log.
- How to import audio files and control audio on importImport audio-only files such as emergency calls with your own display image, skip audio when importing video, and record audio during screen capture.
- How to jump to tags, video start and close all importsThree small time savers: jump from a tag straight to the Review timeline, go to the first or last frame of a video, and close every import window at once.
- How to add a timestamp to an exported video clipBurn a timestamp into clips that have none, using the text annotation, with transparent spotlight and shaded background options.
- How to analyse only part of the frame on importExclude trees, timestamps and other constant motion by choosing the region of the frame Kinesense analyses, from the Advanced import options.
- How to customise the video title slide layoutChange the font, spacing, header and footer images and the fields shown on video report title slides from the Settings Editor.
- How to run FFmpeg preprocess scripts on importRe-encode awkward video during import by running FFmpeg commands from the Advanced section of the import wizard, and save your own preset scripts.
- How to customise evidence info fields in the Settings EditorAdd, remove and require the evidence information fields shown in the import wizard, to match your organisation and support ISO 17025 and chain of custody.
- How to correct a video start time after importFix a wrong recorder clock or start time after import. Adjust the time and time zone, and the change and your reason are written to the disclosure log.
- How to add evidence information to video and image reportsPull the evidence information captured in the import wizard into a video title slide or an image report notes page with one click.
- How to lock and hide annotations in a video clipLock a finished annotation so it cannot be moved by accident, and hide annotations to export different versions of the same clip.
- How to resize and collapse the Report tab workspaceCollapse the Report toolbar and drag the clip list and preview panels to fit a small screen, in every report tab including annotation and clarification.
- How to set frame rate and auto-stop in Screen CaptureOverride the capture frame rate when a third-party player replays too fast, stop capture automatically after a set time, and export a capture report.
- How to pause an annotation with gapsHide a blur or spotlight for part of a clip. Add a gap on the annotation bar while the subject is out of shot; the effect returns when they come back.
- How to copy a filter from one video to anotherReuse a filter across videos instead of redrawing it: right-click it in the Filters tab, choose Copy Filter, then paste it onto another video.
Nothing matches that.Try a broader term, or a feature name such as redaction or timestamp.
Tip #58Kinesense LE
How to add image and measurement layers to maps
Overlay floor plans and other images on the map, measure distances between points, and save, load and delete map layers.
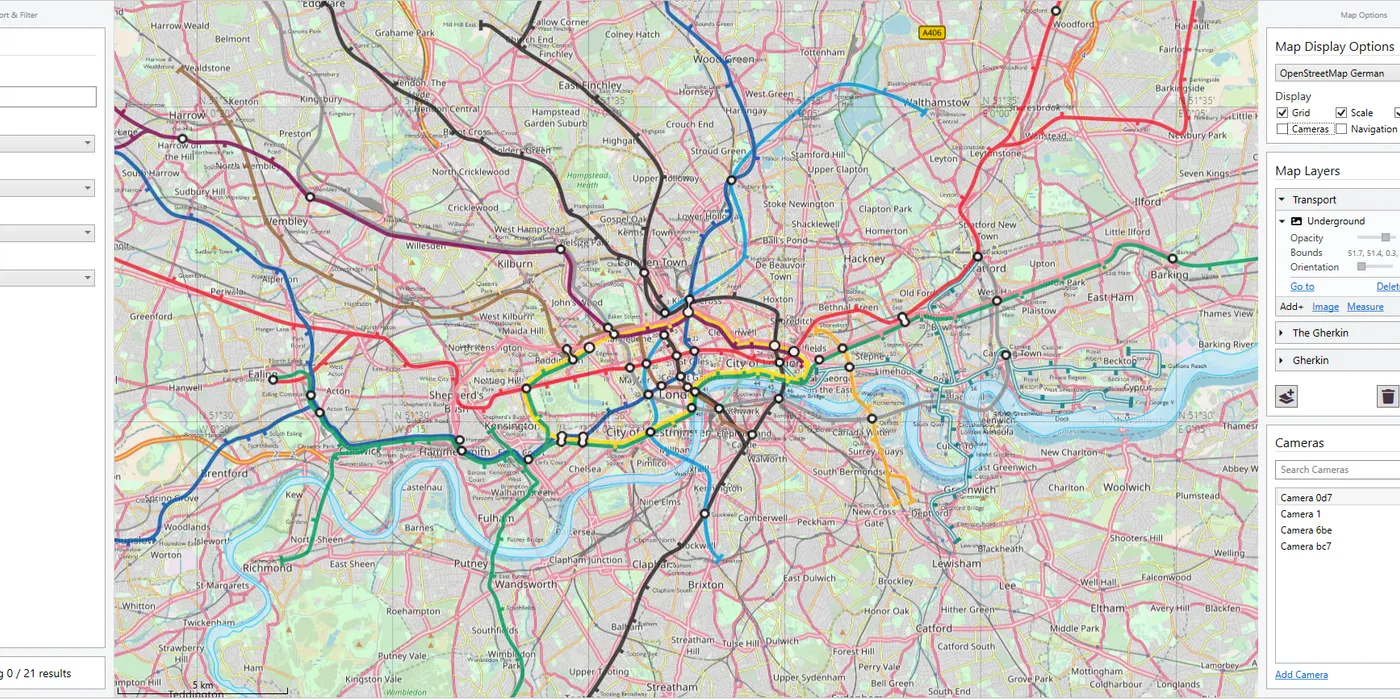
Maps is a new feature we’ve added into our latest 3.3 release. One of the features of maps is the ability to add different layers to a map. Today we’ll be going over how to add layers, what kind of elements you can add to it and how you can manipulate these elements. Previously we’ve discussed the other features in the maps tab and how to add a camera while importing a video.
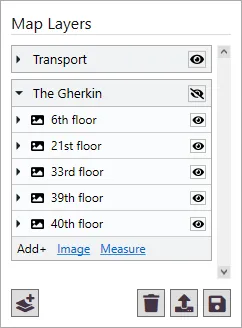
Layers in the maps tab add new elements on top of a map. Currently there are two different types of elements you can add to a layer, image and measure. Adding an image can allow you to add blueprints of buildings, transportation layouts or pictures or giant puppies (I may had added a few for “testing” purposes). The measure element allows you to picture two points on the map and see how far apart they are. This can let you see how far apart two cameras, tags, buildings or any other points on the maps are.
Adding layers and elements
To add a new layer to maps click the Add New Layer button 
The new layer will appear in the layer list where you can now add elements.
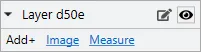
By moving your mouse over the layer name the edit layer name button  will appear. Click that to edit the name of the button.
To add an image element to your layer select Image from the Add+ section. This will bring up the browse menu so navigate to the image you want to add.
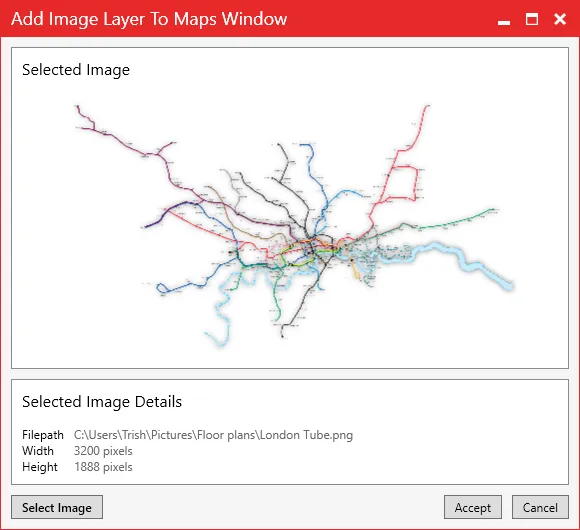
When you’ve selected your image a preview of that image will appear in a preview window. You have the option to select a different image, accept that image or cancel the whole process. If you are happy with that image click Accept. The image will then appear on the map in edit mode, allowing you to resize and move the image.
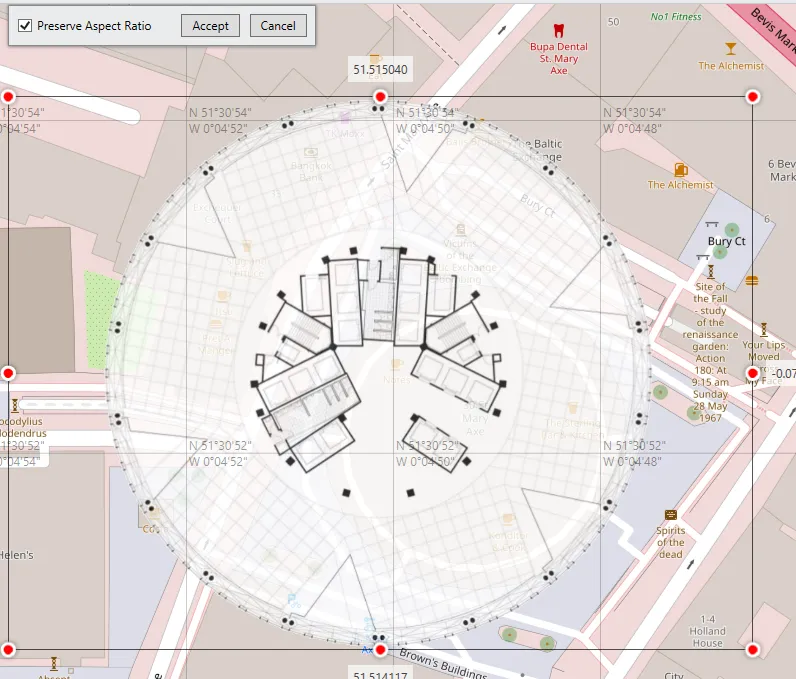
If you leave Preserve Aspect Ratio checked then when you go to resize the image using the corners the aspect ratio will be kept. When you’re finished aligning and resizing select Accept to get out of edit mode.
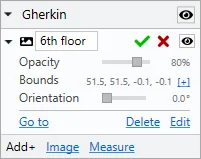
If you wish to change the name of the image element you can again mouse over the name to reveal the edit button . You can also change the visibility, opacity and orientation of the image from here. Go To shows you that image on the map, Delete removed the image and Edit puts the image back into edit mode. You can add multiple images to the same layer.
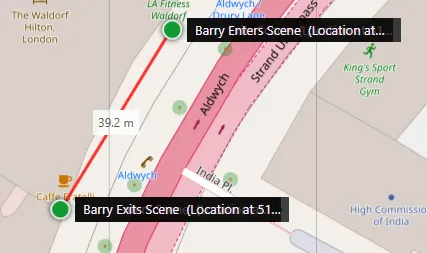
To add a measure element select Measure from the Add+ list.
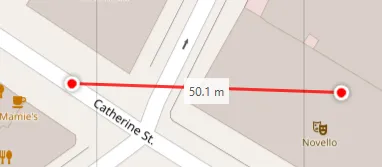
A red line will appear on the map measuring the distance between two points. You can move the two dots at the end of the line to change the area you’re measuring.
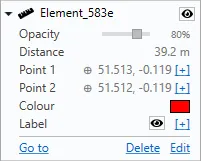
Once you’ve got the distance you want you can click Confirm in the element into box. There you can also change the opacity of but the measure line and the label. Once again to edit the name, hover over the element name and click . You can hide both the entire measure element or just the label and can go to the measure element using ‘Go to’.
Save, load and delete layers
Your layers will be saved automatically in the background when you exit Kinesense and will be loaded up again when you restart. You can also save off your layers and load up different layers. To save you layers click the Save layers to file button  . This will open a save dialogue where you can name your new .maplayers file.
When you want to load layers click the Load layers from file button  . If you already have some layers it’ll warn you that loading the .maplayers file will delete all your current layers. If you don’t want this to happen just cancel out and save your current layers.
If you want to remove an element or layer you can right click on it and select delete from the list
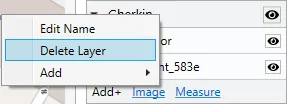
If you want to remove everything from the list you can click the Delete all layers button